How to Sign Messages, Send Transactions, and Get Balance on Solana using AppKit

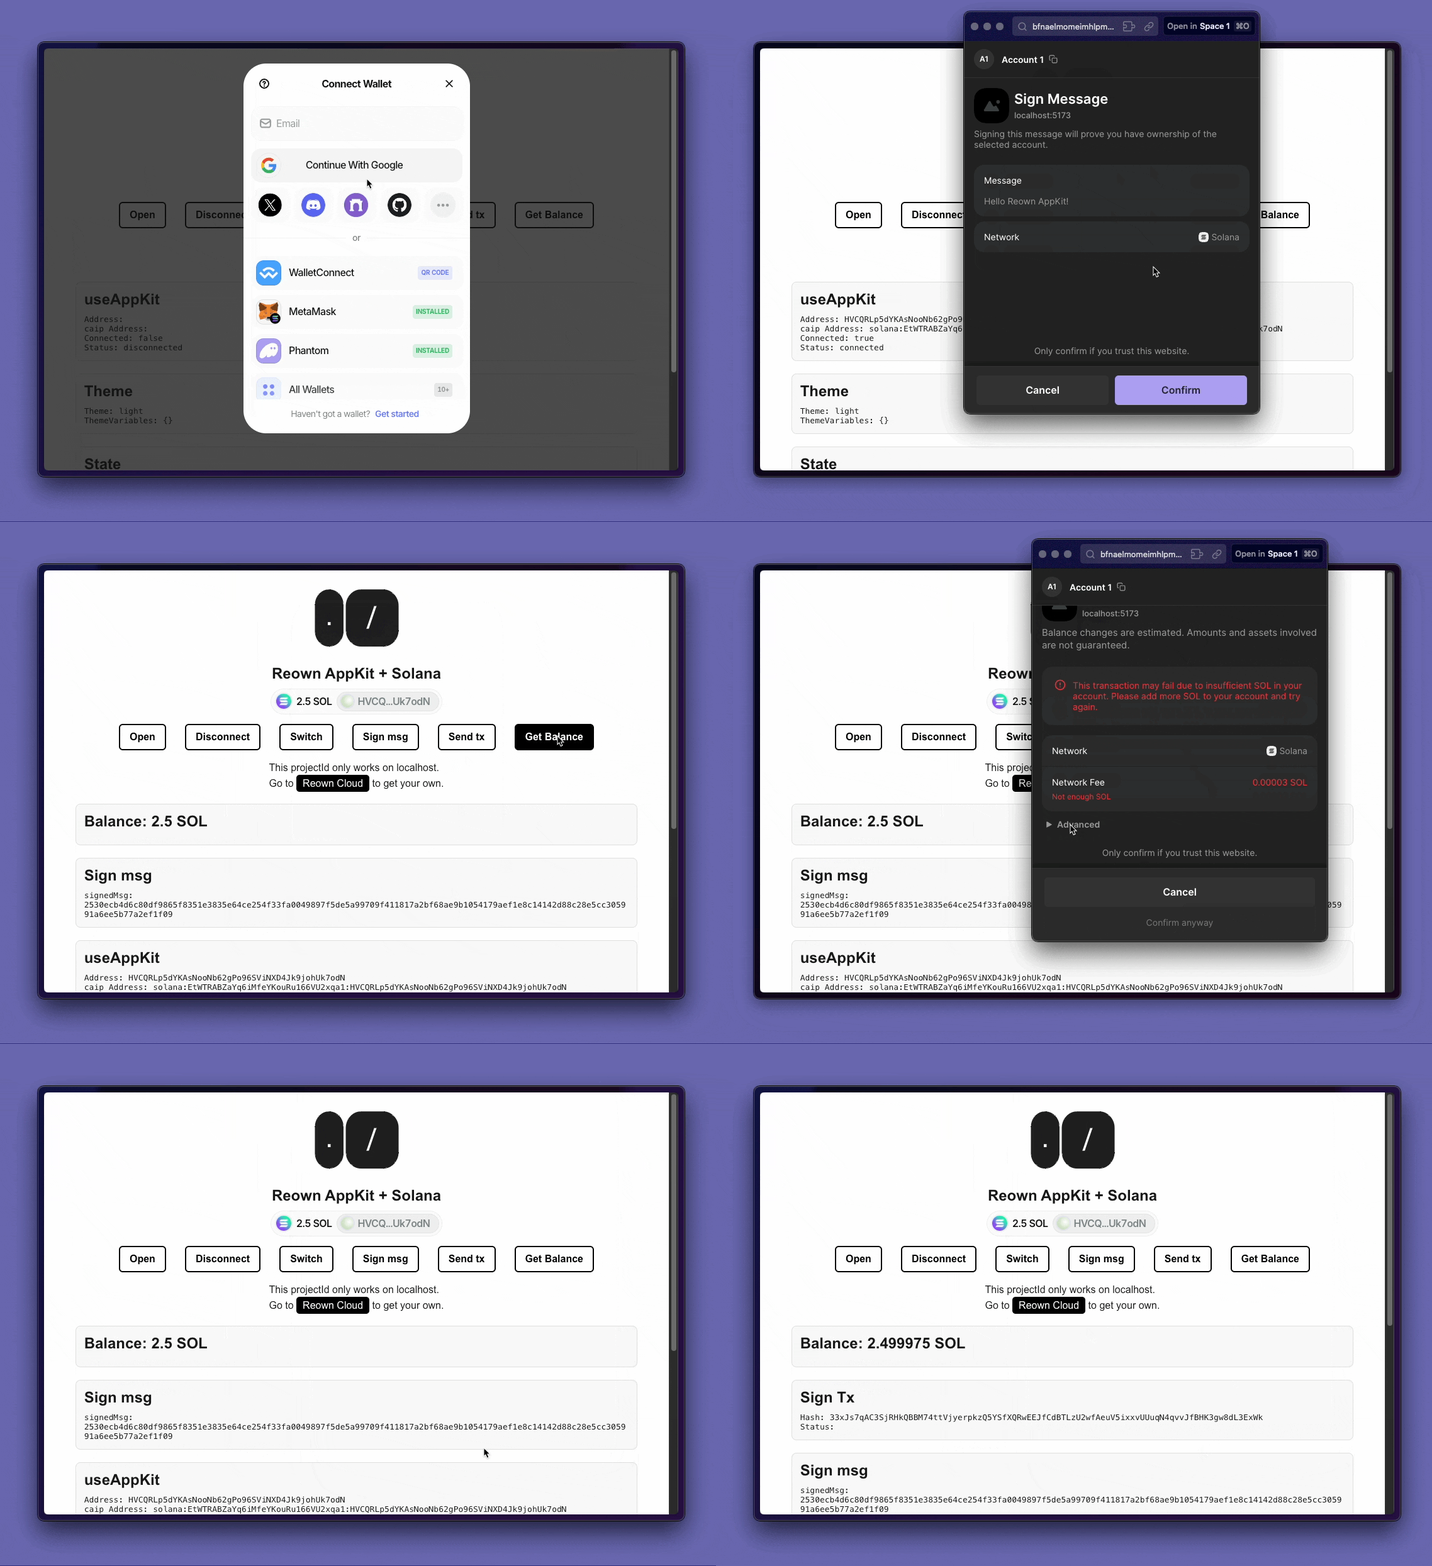
Learn how to use Reown AppKit for essential wallet functionalities such as signing messages, sending transactions, and retrieving wallet balances.


In this recipe, you will learn how to:

  • Retrieve the balance of the connected wallet.
  • Sign a message using a connected wallet.
  • Send a transaction to the Solana blockchain.
This guide takes approximately 20 minutes to complete.

Let’s dive in!

Prerequisites

  • A fundamental understanding of JavaScript and React.
  • A minimal installation of AppKit in React.
  • Obtain a new project Id on Reown Cloud at https://cloud.reown.com

Final project

AppKit Minimal Installation

You can start a small project following the guidelines from our installation React docs using Solana

Start building

In this guide, we are going to use the library @solana/web3.js to make the calls to the Solana blockchain and to interact with the wallet.

Get Balance

Fetching a user's balance is straightforward using the Connection object from Solana.

  1. Start by importing the useAppKitConnection hook from the solana Adapter, the useAppKitAccount AppKit hook to get the account information and PublicKey from the solana/web3 library.
import { useAppKitConnection } from '@reown/appkit-adapter-solana/react'
import { useAppKitAccount } from '@reown/appkit/react'
import { PublicKey, LAMPORTS_PER_SOL } from "@solana/web3.js";
  1. Use the hooks to retrieve the connection Solana object, the user's address and check if they are connected.
const { connection } = useAppKitConnection();
const { isConnected, address } = useAppKitAccount()
  1. Create a function to fetch and display (in console) the balance when triggered
// function to get the balance
const handleGetBalance = async () => {
const wallet = new PublicKey(address);
const balance = await connection?.getBalance(wallet); // get the amount in LAMPORTS

console.log(`${balance / LAMPORTS_PER_SOL} SOL`);
}

  1. Finally, in order to call the function you can show the button in a component when isConnected is true
return (
isConnected && (
<div >
<button onClick={getBalance}>Get Balance</button>
</div>
)
)

Sign a message

In order to raise the modal to sign a message with your wallet. You can follow these steps:

  1. Start by importing the useAppKitProvider hook.
import { useAppKitProvider } from '@reown/appkit/react';
import type { Provider } from '@reown/appkit-adapter-solana/react';
  1. Extract the walletProvider function from the useAppKitProvider hook. This function allows you to prompt the connected wallet to sign a specific message. Also get the address and isConnected as explain before.
// Get the wallet provider with the AppKit hook
const { walletProvider } = useAppKitProvider<Provider>('solana');

// AppKit hook to get the address and check if the user is connected
const { address, isConnected } = useAppKitAccount()
  1. Create a function to prompt the modal for signing the message.
// function to sing a msg 
const handleSignMsg = async () => {
// message to sign
const encodedMessage = new TextEncoder().encode("Hello Reown AppKit!");

// Raise the modal
const sig = await walletProvider.signMessage(encodedMessage);

// Print the signed message in hexadecimal format
console.log(Buffer.from(sig).toString("hex"));
}
  1. Finally, in order to call the function:
return (
isConnected && (
<div >
<button onClick={handleSignMsg}>Sign Message</button>
</div>
)
)

Send a transaction in Solana

In order to raise the modal to sign and send a transaction with your wallet. It's a bit more complex, but you can follow these steps:

  1. Start by importing very similar packages from the previous examples and also the Transaction and SystemProgram object from solana/web3.js library.
import { useAppKitConnection } from '@reown/appkit-adapter-solana/react';
import { PublicKey, Transaction, SystemProgram } from "@solana/web3.js";
import { useAppKitAccount, useAppKitProvider } from '@reown/appkit/react';
import type { Provider } from '@reown/appkit-adapter-solana/react';
  1. Use the useAppKitAccount, useAppKitConnection and useAppKitProvider AppKit hooks to get the connection object, the walletProvider and the address from the user.
const { isConnected, address } = useAppKitAccount();
const { connection } = useAppKitConnection();
const { walletProvider } = useAppKitProvider<Provider>('solana');
  1. Create the function to raise the modal to send the transaction
// function to send a TX
const handleSendTx = () => {
const latestBlockhash = await connection.getLatestBlockhash();

// create the transaction
const transaction= new Transaction({
feePayer: wallet,
recentBlockhash: latestBlockhash?.blockhash,
}).add(
SystemProgram.transfer({
fromPubkey: wallet,
toPubkey: new PublicKey(address), // destination address
lamports: 1000,
})
);

// raise the modal
const signature = await walletProvider.sendTransaction(transaction, connection)

// print the Transaction Signature
console.log(signature);
}
  1. Finally, in order to call the function:
return (
isConnected && (
<div >
<button onClick={handleSendTx}>Send Transaction</button>
</div>
)
)

Conclusion

By following this guide, you’ve learned how to integrate Reown AppKit and Solana into your React application to perform essential wallet operations. You can now fetch wallet balances, sign messages, and send transactions in the Solana blockchain.

Keep exploring AppKit to enhance your dApp’s functionality and user experience!