If you are planning to build a dApp that connects client wallets using WalletConnect QR in a chain-agnostic environment, the best way is to use our Universal Connector, which simplifies the integration process, provides flexibility across multiple networks, and ensures a consistent user experience. In this recipe, you will learn how to:
  • Use Universal Connector to connect a wallet using WalletConnect QR Code
  • Configure supported networks for your dApp
  • Manage session state for connected wallets
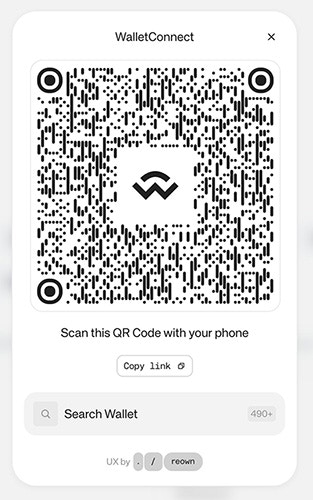
This guide takes approximately 20 minutes to complete. Let’s dive in! WalletConnect QR Code

Prerequisites

Final project

WalletConnect SDK with QR Code

Download the full project to try it directly on your computer using Universal Connector.

Try the demo

Installation

In order to set up the project, you need to install the following packages:
npm install @reown/appkit @reown/appkit-universal-connector @reown/appkit-common

Start building with Universal Connector

You can configure with the networks you want to support. For more information, please visit RPC Reference section from our docs. We recommend creating a config file to establish a singleton instance for the Universal Connector:
import type { AppKitNetwork } from '@reown/appkit/networks'
import type { CustomCaipNetwork } from '@reown/appkit-common'
import { UniversalConnector } from '@reown/appkit-universal-connector'

// Get projectId from https://dashboard.reown.com
export const projectId = import.meta.env.VITE_PROJECT_ID || "b56e18d47c72ab683b10814fe9495694" // this is a public projectId only to use on localhost

if (!projectId) {
  throw new Error('Project ID is not defined')
}

// Example: configure Sui mainnet
const suiMainnet: CustomCaipNetwork<'sui'> = {
  id: 784,
  chainNamespace: 'sui' as const,
  caipNetworkId: 'sui:mainnet',
  name: 'Sui',
  nativeCurrency: { name: 'SUI', symbol: 'SUI', decimals: 9 },
  rpcUrls: { default: { http: ['https://fullnode.mainnet.sui.io:443'] } }
}

export async function getUniversalConnector() {
  const universalConnector = await UniversalConnector.init({
    projectId,
    metadata: {
      name: 'Universal Connector',
      description: 'Universal Connector',
      url: 'https://appkit.reown.com',
      icons: ['https://appkit.reown.com/icon.png']
    },
    networks: [
      {
        methods: ['sui_signPersonalMessage'],
        chains: [suiMainnet as CustomCaipNetwork],
        events: [],
        namespace: 'sui'
      }
    ]
  })

  return universalConnector
}
As you can see, we are importing the UniversalConnector class from the @reown/appkit-universal-connector package. Then you can use the projectId that you can get from the Reown Dashboard. After that you can configure the networks you want to support. The method init receives the projectId, the metadata and the networks you want to support. In the App.tsx file you can add :
import { useState, useEffect } from 'react'
import { getUniversalConnector } from './config' // previous config file
import { UniversalConnector } from '@reown/appkit-universal-connector'

export function App() {
  const [universalConnector, setUniversalConnector] = useState<UniversalConnector>()
  const [session, setSession] = useState<any>()

  
  // Initialize the Universal Connector on component mount
  useEffect(() => {
    getUniversalConnector().then(setUniversalConnector)
  }, [])

  // Set the session state in case it changes
  useEffect(() => {
    setSession(universalConnector?.provider.session)
  }, [universalConnector?.provider.session])
This ensures: The Universal Connector is initialized when the component mounts. The session state updates whenever the connected wallet session changes. With this setup, you’re now ready to build wallet connections in a chain-agnostic way using WalletConnect QR codes.

Connect a Wallet

The following function initializes the connection and stores the session:
    const handleConnect = async () => {
      if (!universalConnector) {
        return
      }
  
      const { session: providerSession } = await universalConnector.connect()
      setSession(providerSession)
    };
Once the wallet is connected, the session information (such as accounts and namespaces) will be available in your app. You can then use this session to perform actions like signing messages or sending transactions.

Sign a Message

Once your wallet is connected, you can also use the Universal Connector to sign messages. This is useful for authentication or verifying ownership of an address. Here’s an example of how to sign a personal message on Sui:
// Function to sign a message on Sui
const handleSignSUIMsg = async () => {
  if (!universalConnector) {
    return
  }

  const message = "Hello Reown AppKit!" // message to sign
  try {
    const account = session?.namespaces['sui']?.accounts[0]
    if (!account) {
      throw new Error('No account found')
    }

    const result = await universalConnector.request(
      {
        method: 'sui_signPersonalMessage',
        params: [message]
      },
      'sui:mainnet'
    )
    // eslint-disable-next-line no-console
    console.log('>> Sui Sign Message result', result)
  } catch (error) {
    // eslint-disable-next-line no-console
    console.error('>> Sui Sign Message error', error)
  }
}
You can trigger this function with a simple button:
<button onClick={handleSignSUIMsg}>
  Sign Message
</button>
This will prompt the connected wallet to sign the message “Hello Reown AppKit!” and log the result in the console.

Disconnect a Wallet

It’s important to give users the option to disconnect their wallet from your dApp. This clears the active session and ensures the wallet is no longer linked until the user chooses to reconnect. Here’s a simple function to handle disconnection:
const handleDisconnect = async () => {
  if (!universalConnector) {
    return
  }
  await universalConnector.disconnect()
  setSession(null)
}
When called, this will terminate the session and reset the state in your app. You can bind it to a “Disconnect” button in your UI to make it accessible to users.